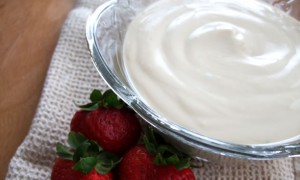
 Yogurt is a super-nutritious food, full of beneficial bacteria (Probiotics). Especially “homemade” yogurt, as most store-bought yogurts contain some sort of additives and/or thickeners-stabilizers.
We use yogurt a lot around here for making smoothies, eating plain (or with fruit) for a snack or great breakfast, and in the summer we make creamy yogurt popsicles. There are so many ways to enjoy yogurt. It makes great sauces as well, such as Tzatziki to go with burgers…yummm!
Well, now that I’m making myself hungry….let’s go ahead and get into the “How-To’s” of making yogurt.
Homemade Yogurt
You can adjust the ingredients according to how much yogurt you want to make. I usually make 1/2 gallon at a time, then I only have to make yogurt once a week (which is about how long yogurt will stay the freshest anyway).
- 1/2 gallon whole milk (can use raw milk, organic milk, or regular milk…but NOT ultra-pasteurized)
- 1/4 cup Plain Whole-Milk store-bought Yogurt, use a good quality brand that CONTAINS “Live” Cultures (I Like Brown Cow – Plain Cream Top)
*Note: After you make your first batch, save some of your homemade yogurt to make the next batch. Make yogurt once a week to keep the culture fresh.
You Will Also Need:
– Pan, big enough to heat milk in
– Spoon, to stir milk (always use a non-metal spoon to stir or serve dairy products, to keep them fresh longer)
– Glass Jar(s), with lid(s) (big enough to hold the amount of yogurt you are making)
– Insulated Cooler or smallish box, to hold your jar of yogurt
– Jar of very hot water, with lid on (if your house is cold/during the fall or winter months)
– Kitchen Towel(s) or a Small Blanket (to wrap your jar of yogurt in)
– Kitchen Thermometer, to measure the temp of the heated milk (NOT a candy or meat thermometer)
- Rinse inside of pan with cold water, dump out, but do not dry pan (this helps keep the milk from scorching and sticking to the bottom of pan).
- Pour milk into pan and warm over medium heat, stirring frequently. Allow the milk to come to 180F. Hold at 180F for 30 seconds to 1 minute, while constantly stirring. (It’s OK if it goes a degree or two over.)
- Remove pan from heat and allow to cool to 118F, stir every-so-often to help the milk cool faster. (If a skin/film forms on the surface, simply spoon it off and discard.)
- Meanwhile, measure out your yogurt starter culture (from the store-bought yogurt or homemade if this is a subsequent batch)…allow it to come to room temperature while the milk cools.
- Once the milk has reached 118F, not any higher, slowly whisk in the yogurt culture into the cooled milk. Make sure it is thoroughly combined.
- Pour this mixture into your glass jar(s) and cap. Do this all quickly, you want the milk to be at 110F-115F when you put it in the cooler. (Do not re-heat the milk once the culture is added.)
- Place filled-capped jar(s) inside insulated cooler or box. If it is particularly cold out, you may want to fill a jar with very hot tap water, cap, and place in the cooler/box as well. Wrap jar(s) with kitchen towel(s) or a blanket.
- Close cooler or box completely (I use a square soft-sided cooler that zippers shut).
- Allow to culture, undisturbed for 12-hours, or more, up to 24 hours. *Note: if culturing for 24-hours, at the 12-hour mark add a fresh jar of hot water in the cooler. This 24-hour yogurt will be more tart than the 12-hour yogurt, but will have more of the milk sugars eaten up.
- When yogurt done culturing, remove jar(s) from cooler and transfer to fridge to chill. Yogurt will thicken a little more in the fridge. Wait until well-chilled before serving or your yogurt will break-down and separate easily.
NOTE: Be sure to always set aside and save enough of the plain homemade yogurt to use for your next batch.
*Sugar-Free / Grain-Free